
Page Contents
Cyberpunk Map breaks after latest Nvidia GPU Driver, Here’s the Fix
Cyberpunk 2077 is an RPG set in a dystopian future world. Players play the role of V, a mercenary in Night City, California. Branching storytelling, open world exploring, character classifications, and battle are all part of the gameplay. The year is 2077, and the game is based on Mike Pondsmith’s pen-and-paper tabletop classic Cyberpunk.
Since its unsteady original release in December 2020, the action roleplaying game has undergone numerous fixes to address gameplay mechanics, aesthetics, bugged missions, and other abnormalities that players may encounter on their trip through Night City.
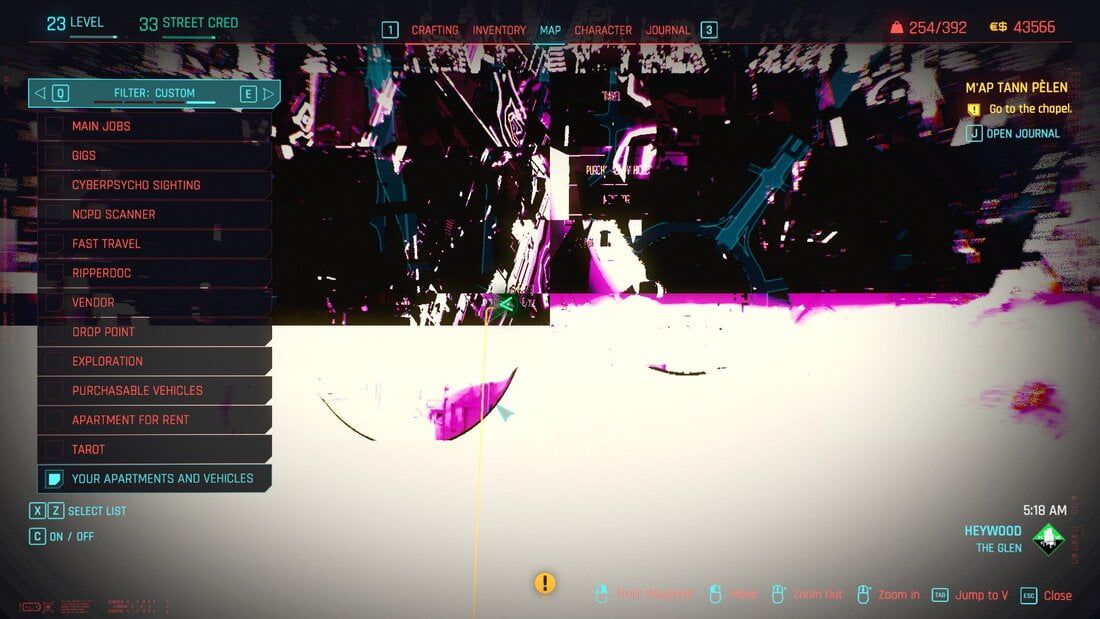
The culprit this time however is not the game, NVIDIA today released Game Ready driver 522.25, this update is breaking the map in Cyberpunk 2077. We recommend waiting for a hotfix if you haven’t updated the GPU drivers yet. If you did update, a simple roll back will fix the issue.
This Latest Driver primarily adds support for the new GeForce RTX 4090 and day-one optimization for upcoming titles such as Scorn, A Plague Tale: Requiem, Uncharted: Legacy of Thieves Collection, and Gotham Knights.
Update: “A fix will be pushed to users PCs via an over the air update in the coming days.” said Nvidia. The bug causing the Artifacts on Cyberpunk Map has been fixed, you can follow this link for the solution.
Follow these steps to fix the Cyberpunk Map Glitch
How to Rollback Your Nvidia Drivers
If you did update the drivers, a simple Rollback of the Driver will fix the map issue instantly. Here’s how to do it:
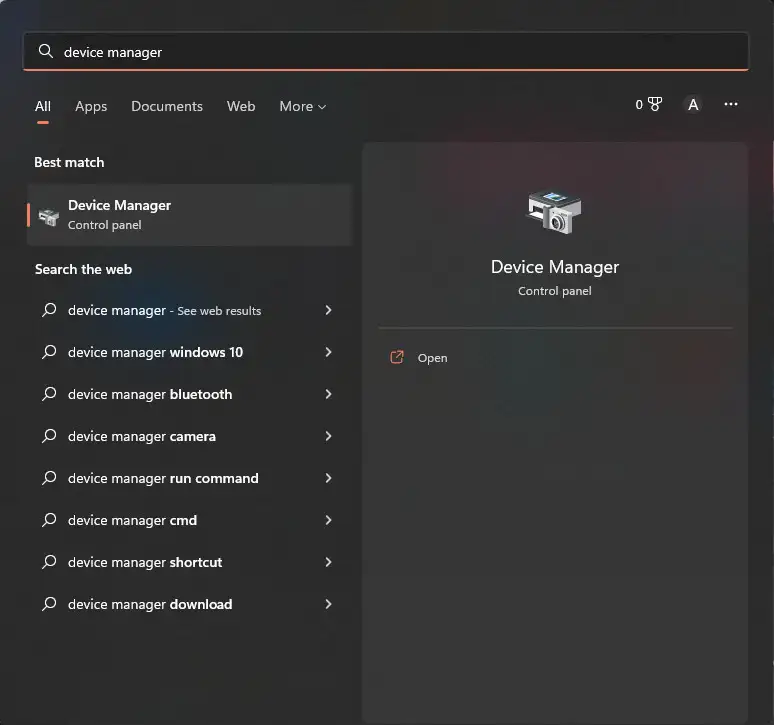
The Device Manager in Windows is where you manage and update all of your PC’s device drivers. Device Manager also allows you to uninstall and disable devices. If you’re using NVIDIA’s GeForce Experience to control your drivers, using Device Manager to roll back your drivers can be more effective.
- To access Device Manager, press the Windows Key and type Device Manager into the search field. Select the top result to launch the application.
- Scroll down to the Display Adapters section in Device Manager. To expand the list, click the arrow.
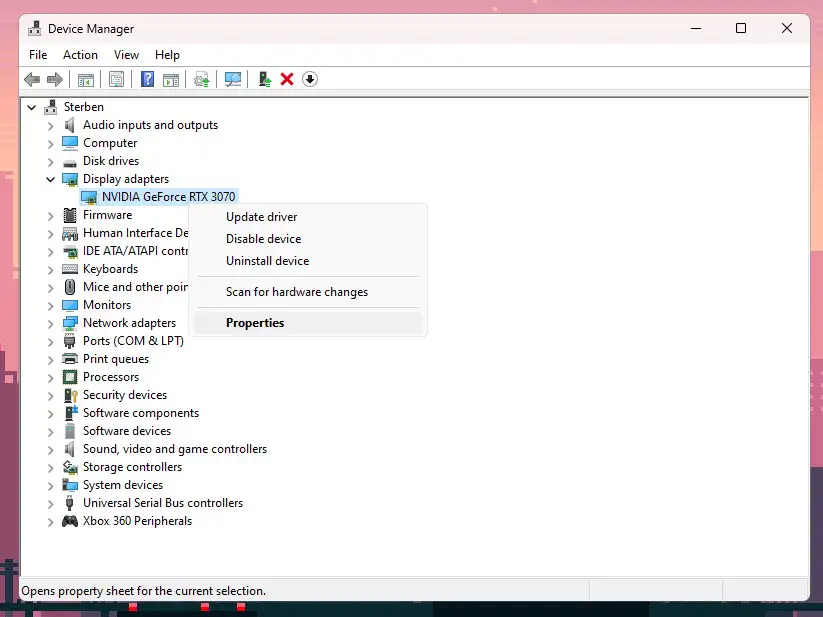
- You should see a list of the GPUs that are currently installed on your PC. To reach the Context Menu, select the NVIDIA device and press the Right-Hand Mouse Button (RMB).
- Select Properties from the Context Menu to open the Device Properties Window.
- The Properties Window displays the Device Status, allows you to inspect the driver details, and provides more information about the resource settings.
- Select the Drivers Tab to roll back your GPU driver.
 Note: Once you have reverted to the prior driver, the Roll Back option on the Driver page will no longer be available. Here, I have already roll backed the driver.
- The Driver tab allows you to check driver data, update the driver, uninstall the device, rollback the driver, or totally disable the GPU.
- Select Roll Back Driver to return your driver to the version you were using before to the most recent update.
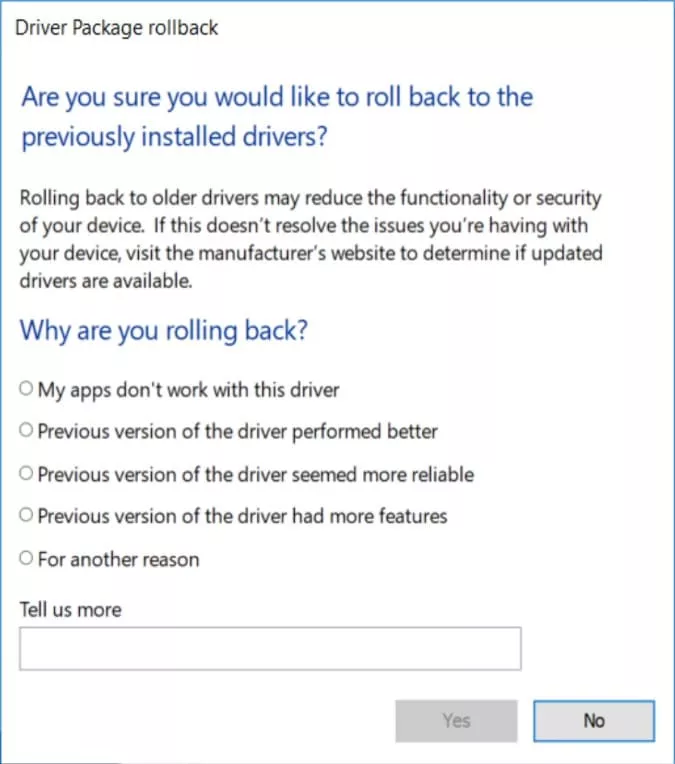
- Windows will ask you to explain why you’re uninstalling the driver. This is done to track driver faults and give better service to other customers in the future. Choose “Previous Version of the Driver Seemed More Reliable.”
- Restart the PC, and the Cyberpunk map glitch should be fixed now.
Reinstall your Previous Nvidia Drivers if no Rollback Option
If you don’t see the option to roll back your driver, it could be because you installed the latest version by selecting “clean install”. In this situation, you still can revert to a previous version by simply uninstalling the latest version and installing an earlier one from NVIDIA’s website. Follow these steps to go back to the previous version:
- To uninstall the current version, press the Windows Key and type Control Panel, then choose the top result.

- Select “Uninstall a Program” from the Control Panel. If you can’t find it, change the display from Categories to Small Icons and look for “Programs and Features.”, click that.
- Scroll down to locate the NVIDIA Graphics Driver software in Programs and Features.
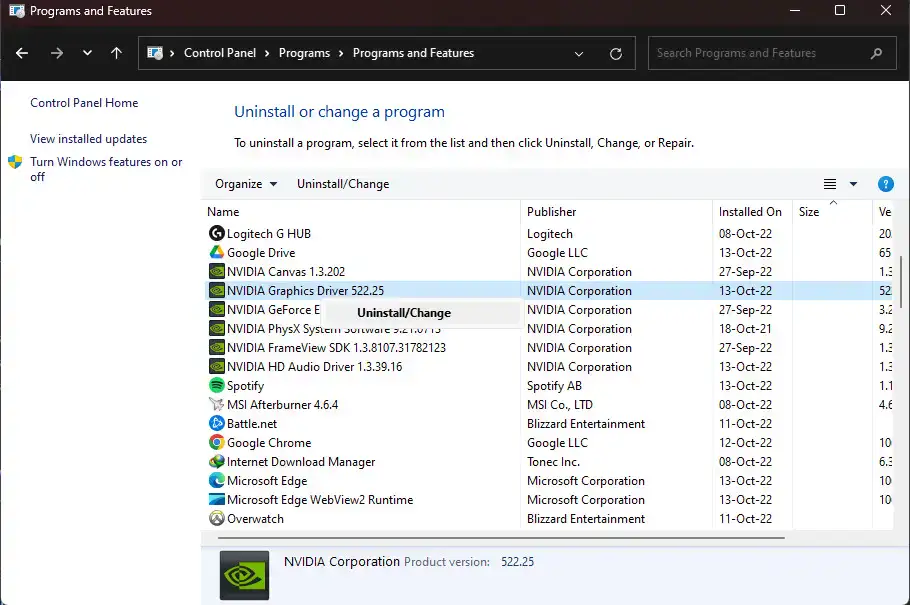
- To open the Uninstaller, choose the software and then click Uninstall / Change.
- This will launch the NVIDIA Uninstaller, which will allow you to modify your driver software.
- You must confirm that you wish to delete the drivers. To proceed, click Uninstall.
- After the process is finished, you must restart your computer to complete the process.
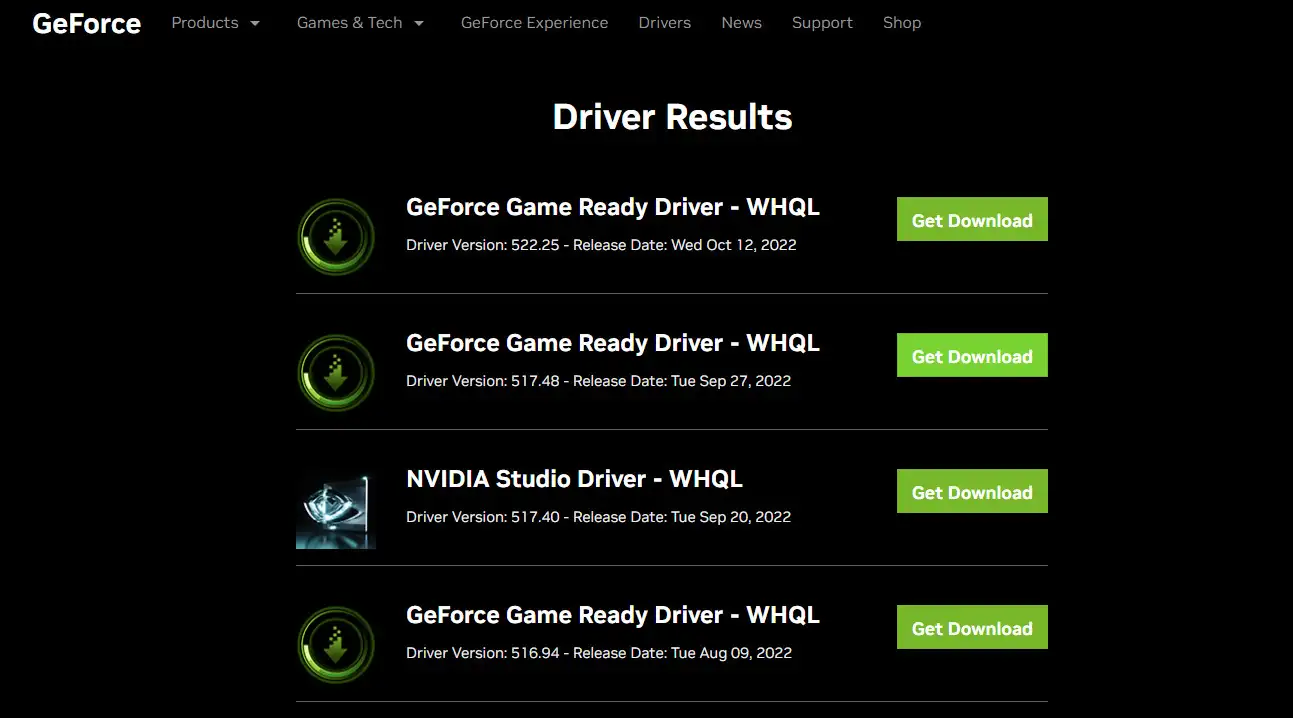
- After restarting your computer, go to the NVIDIA website and download the appropriate driver. To find a list of older drivers, perform a manual search for your device model.
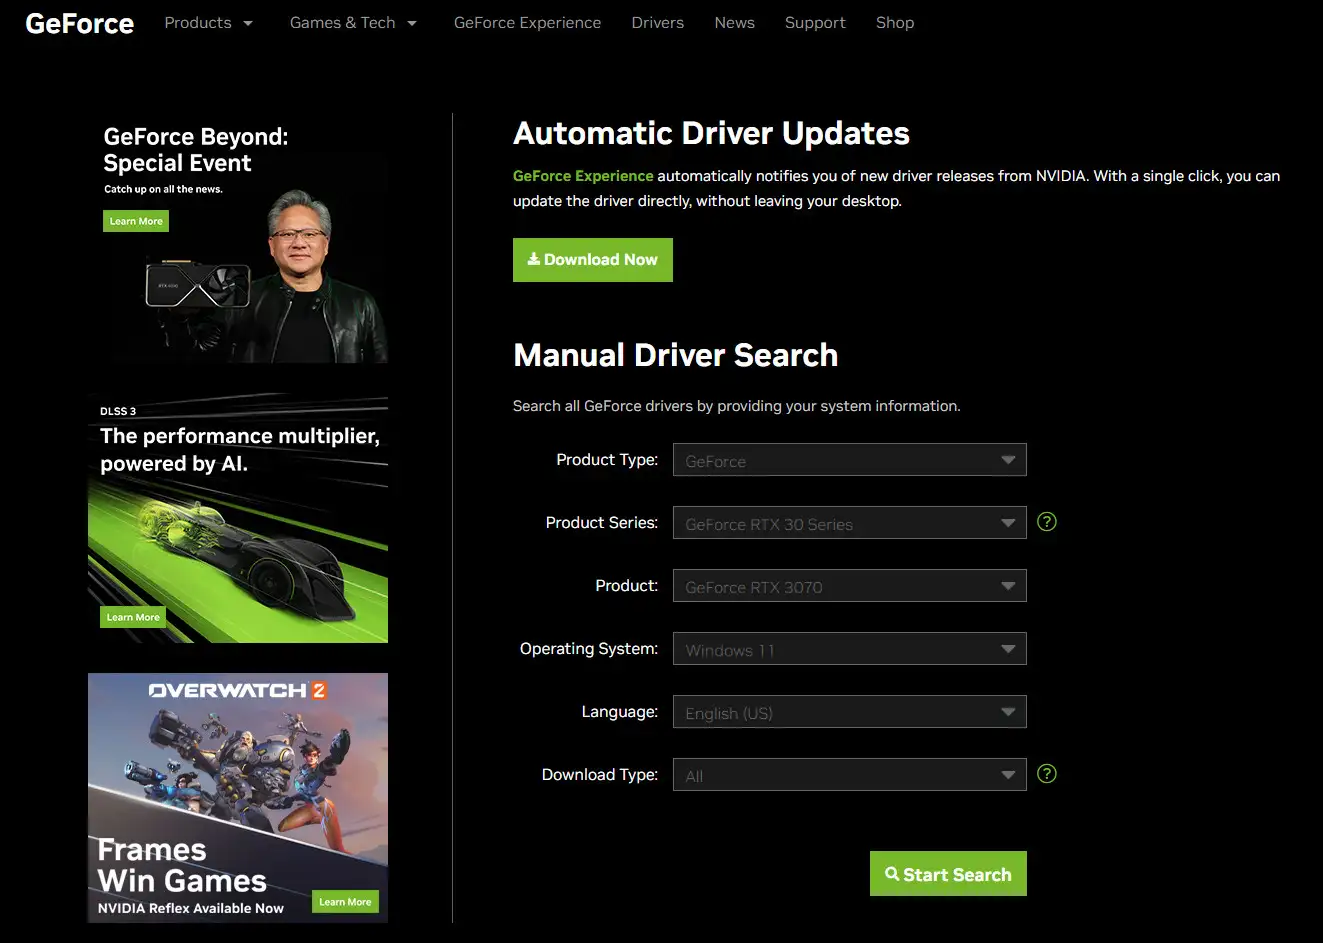
- After you’ve chosen the model of your GPU, click the Start Search button. NVIDIA will offer you with a selection of available drivers for your device, from which you may select the one that provides the greatest performance. (In my case the version is 517.48)
- Download the driver from the website, save it to your computer, and then double-click the file to begin the installation procedure.
- Accept the installer’s default extraction folder and wait for it to load. When the installer is running, select the NVIDIA Graphics Driver option and click Agree and Continue.
-
After the process is done, you will receive a notification confirming that the installation was successful, and that the device is now available for use.To finish, click the Close button.
- Restart the PC, and the issue will be fixed.
What do you think about this? Let us know below.
Like us on Facebook and Follow us on Twitter for latest updates.
For latest news in your hands Follow us on Google News.


Thanks for the fix, thought I was gonna have to wait for a bug fix.
Hello, the rollback drive is not available for me, even if i didnt do it before.
what can I do?
I’m updating the article with an alternative right now! Stay tuned.
Edit: The article has been updated!
Howdy! Do you use Twitter? I’d like to follow you if that
would be ok.
Thanks!, Here’s our Twitter: https://twitter.com/GVipOfficial